Japanese Bag – Sewing Tutorial
#1 Introduction
While attending school in Japan, we learned how to make these little bags. After making one in class [and taking way to long to finish it], I have made a few more, and I thought I’d share how to make them with you today.
In Japan many of my classmates used the ones they made to transport their toothbrush and toothpaste, or as a bag to carry their Bento lunch boxes. I am currently using mine as a pencil case.
You can download a printable version of the following instructions at the end of this post.
#2 Instructions
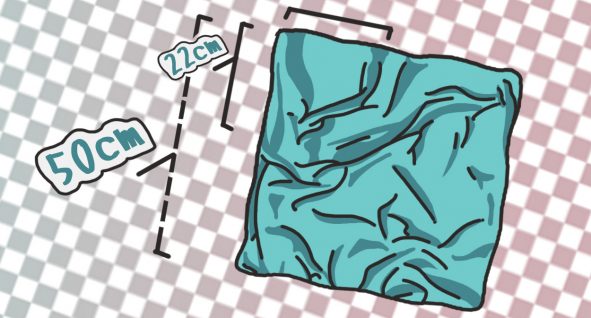
To make this bag you will need:
A piece of 50x50cm fabric. If you are in Japan, you can get a furoshiki at a 100¥ store.
1m of thick string
Turn your textile over so that the backside is facing up, then measure 22cm from two opposing corners and make marks there with a pencil or piece of chalk.
Fold the top right corner over and secure it safely with dressmaking pins.
3mm into the side, carefully use a running stitch to sew the two layers together. Then use a cross-stitch to do the same horizontally from the bottom.
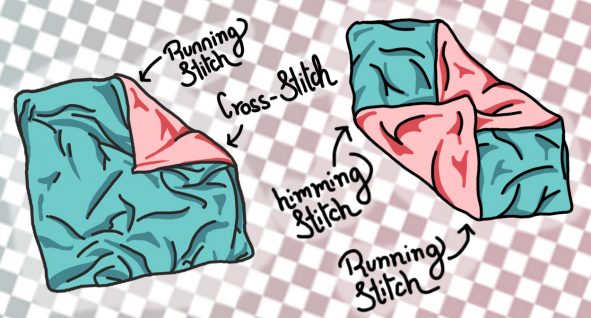 These stitches will be visible at the end so make sure they are nice and neat.
After properly securing the top corner to the base, fold over the bottom corner at the longer edge, starting from your mark at 22cm down to your mark at the bottom corner. Again, secure this with dressmaking pins.
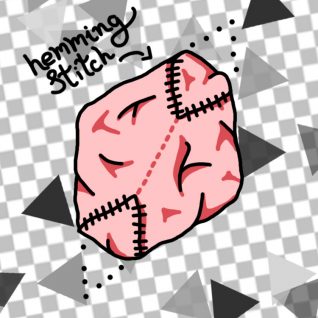
Use a neat, tight hemming stitch to sew the top to the base.
The same way you did above, 3mm into the side, carefully use a running stitch to sew the two layers together.
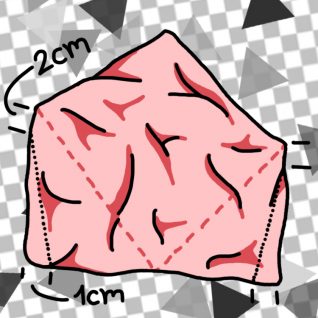
After the two corners have been properly sewn to the base, fold your fabric in half so that the front of the backside is on the inside and the nice side of the fabric that was facing the table before is on the outside.
Draw a line using chalk 2cm from the top and 1cm from the side of the fabric on both sides, as shown in the image. This line should be as straight as possible, as it affects many further steps.
Use neat backstitching on both sides. This is the main stitch holding your bag together in the end, so make sure that this one is done properly.
Turn your bag to the side, opening the flaps created in your previous stitch.
Make marks 7cm from the bottom on either side and draw a line using chalk.

Using a very tight running stitch, sew over this line. Go over the flaps and center twice to make sure they are sewn in this open position, as it is more secure.
Then repeat these steps on the other side.
Turning your bag to the bottom, flip over the corners that you created in the previous step and secure it with dressmaking pins.
Using a neat hemming stitch, sew the flaps to the base, making sure to only go through the top layer of fabric, and not through both, so that the stitch doesn’t show through.
 Turn the bag inside out.
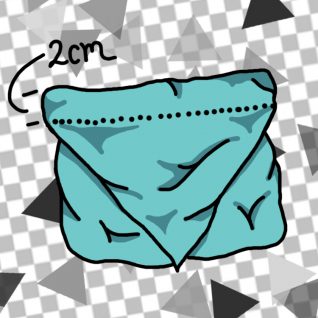
Drawing a line two centimeters from the top with chalk. Using a very neat backstitch, sew across the entire length of the bag. Then repeat this step on the other side.
Cut your 1m string in half and thread one of the 50cm strings all the way through the gap created. Then tie a simple not into the string. Starting from the other side this time, thread the remaining 50cm string through the gap and tie the ends together.
#3 Download
Click the image to download an A4 printable instruction sheet. 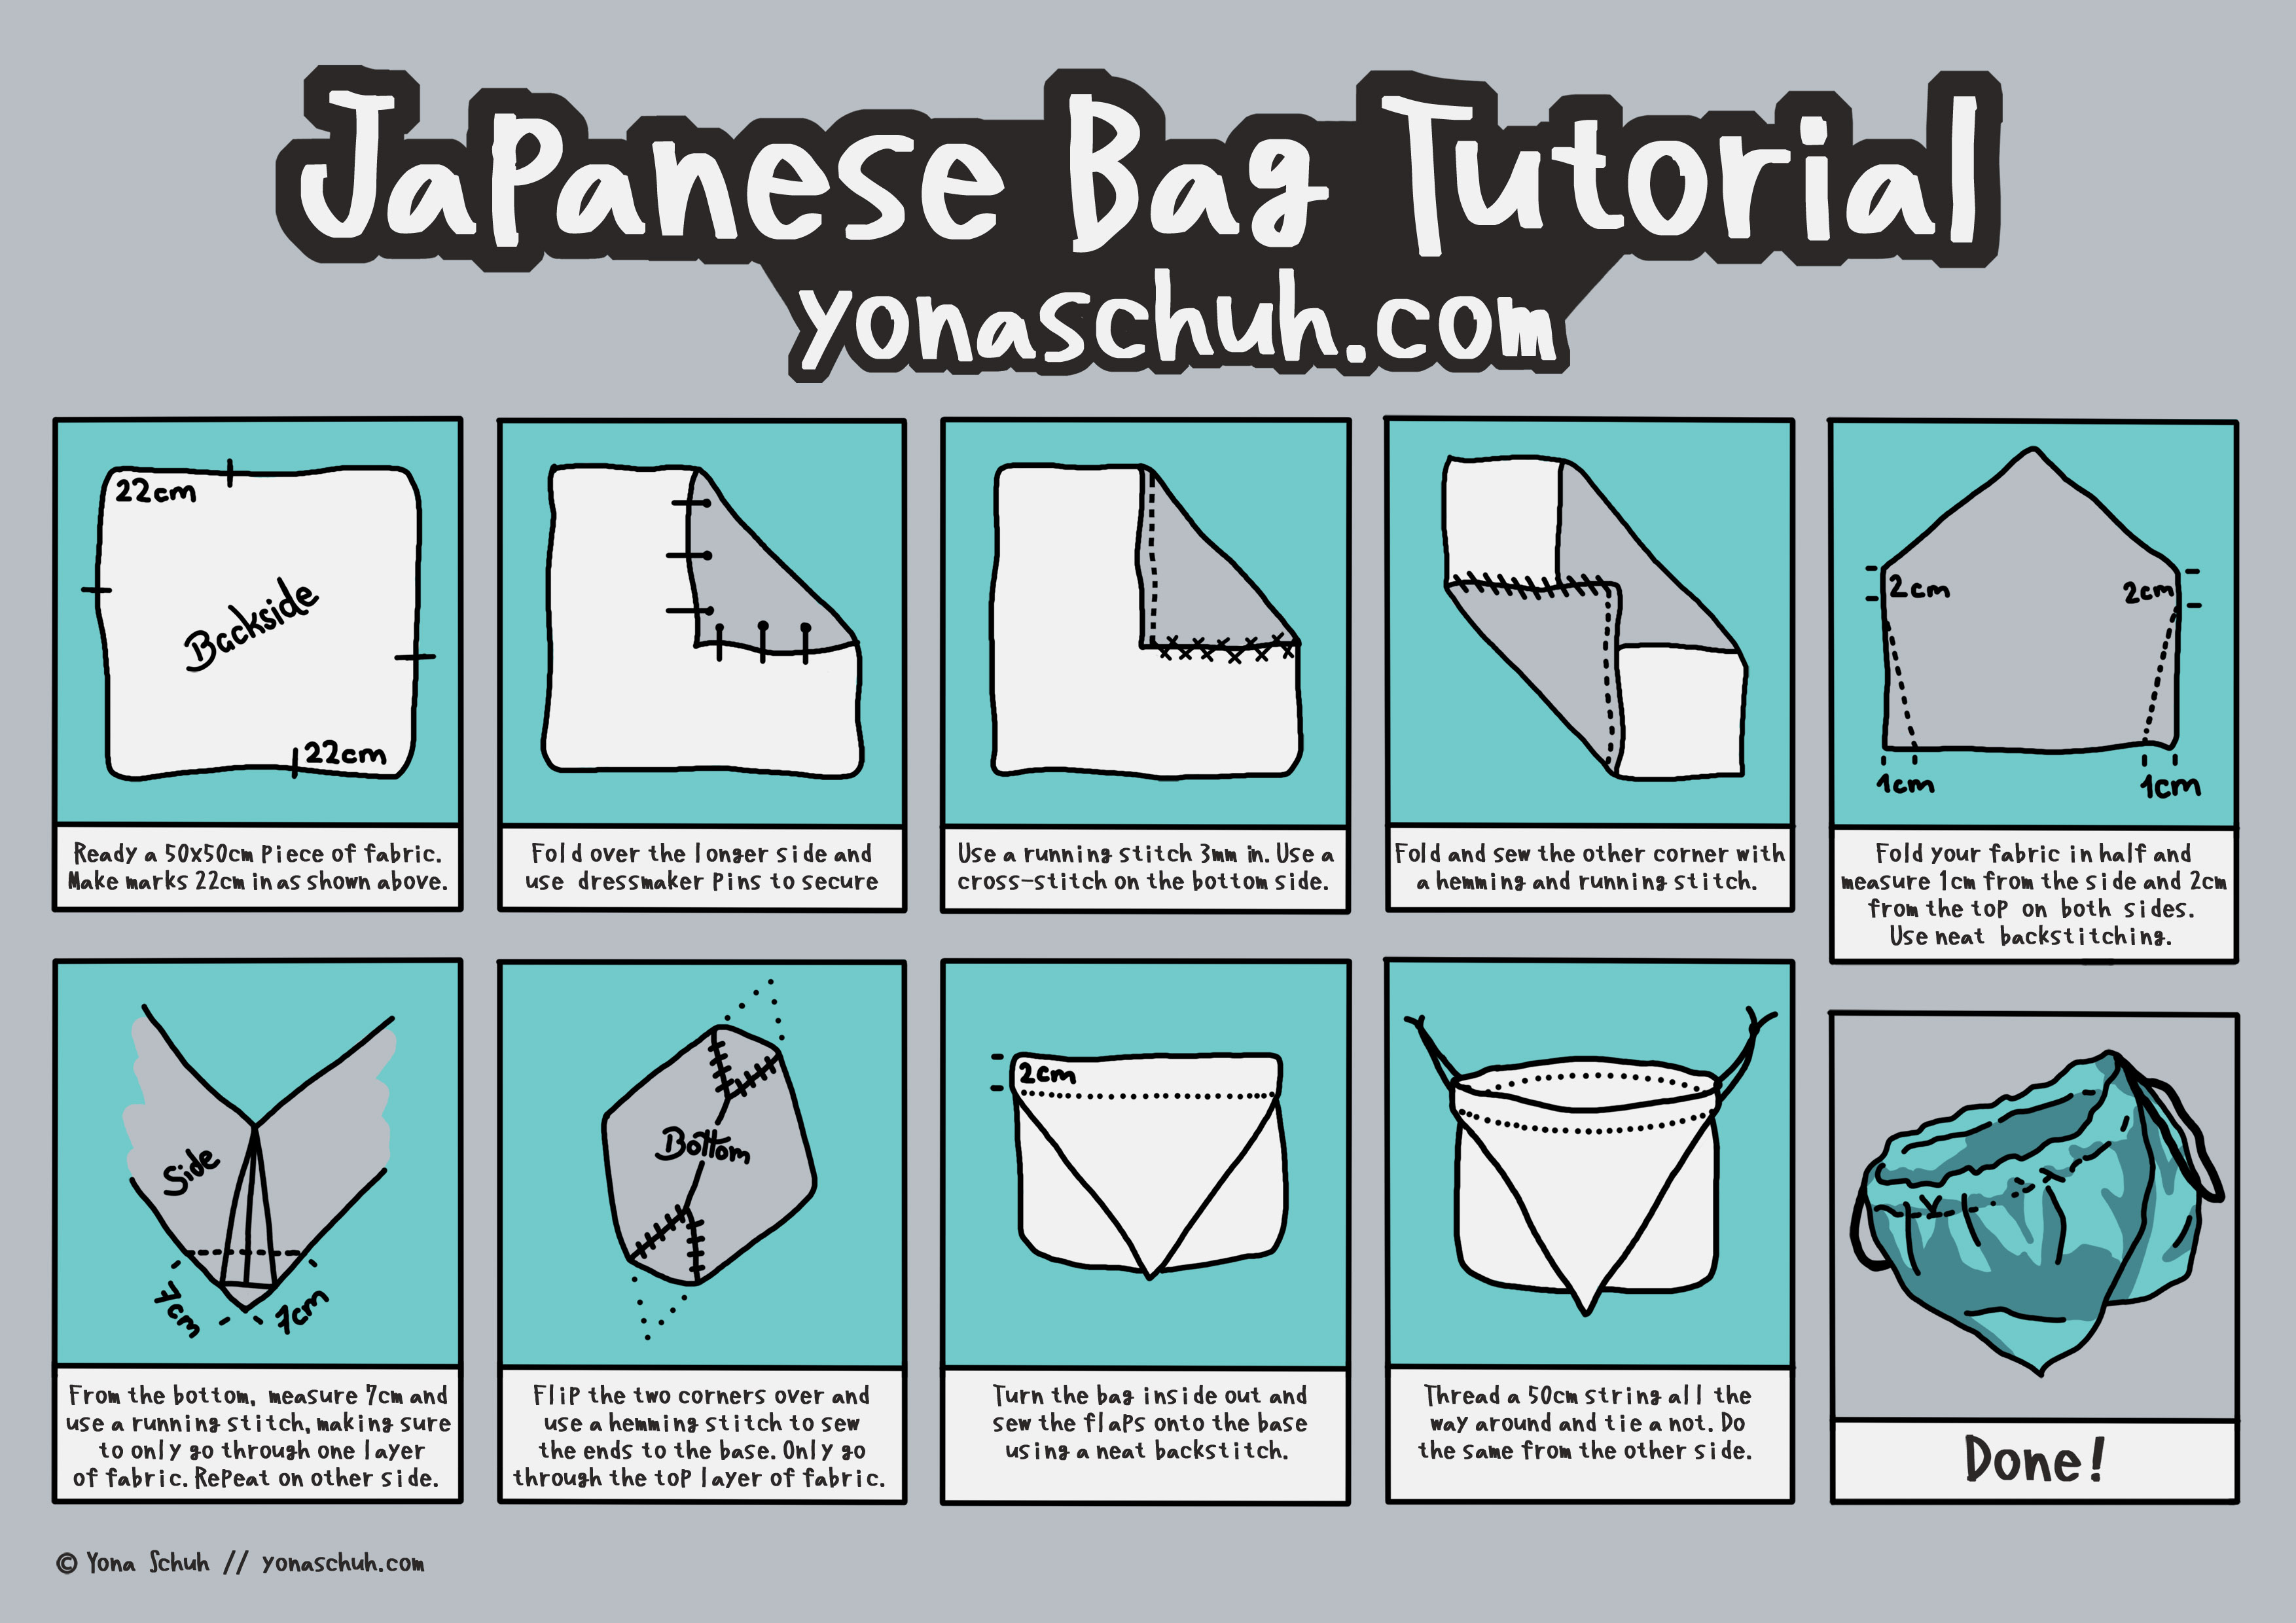
#4 Wrap-Up
I hope you enjoyed this tutorial!
If you decide to make your own bag, show me a photo of your results on Twitter or on Instagram!
See you in two weeks for another post,
until then,
Send a postcard,
Yona
[…] gift giving, I have a complete guide here. If you want to try some more Japanese crafts, I have a simple sewing tutorial […]